Creating a more customizable interface for Firebase/GCM Notifications through Google Docs
This is the second post in a series about using Firebase as a backend content management system that faces people who are not developers. The first post in this series is over here.
I have an app that uses Firebase for its backend. The app is a platform for lesson plans, and the lesson plan content is managed by a non-developer. In my last post, I discussed how I set up our Firebase server to be more consistently structured and more familiar by using Google Sheets as the primary entry point for content managers.
There’s another feature from Firebase that the app’s content managers use, though: Firebase Notifications. Firebase Notifications are a super easy way to send push notifications to your app, and we use them to send tips and updates on the lesson plans to the teachers who use the app.
What makes Firebase Notifications so great is that the Firebase Console includes a nice interface for sending the notifications to a device. You can just type some body text for the notification and send it off!
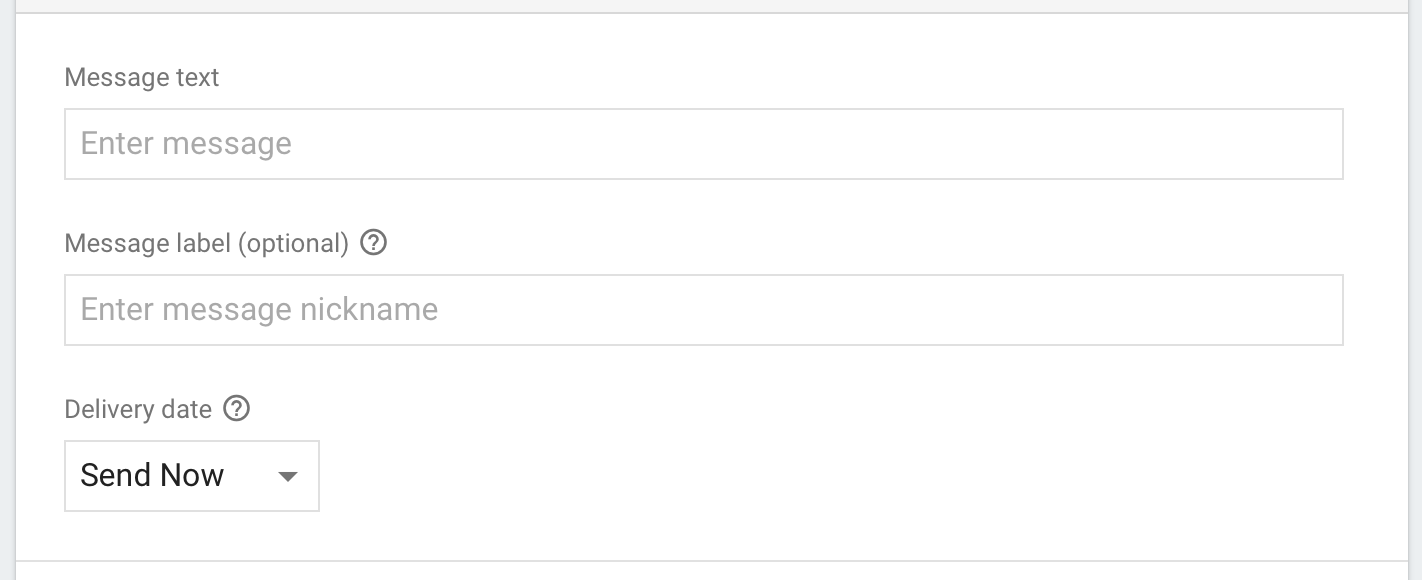
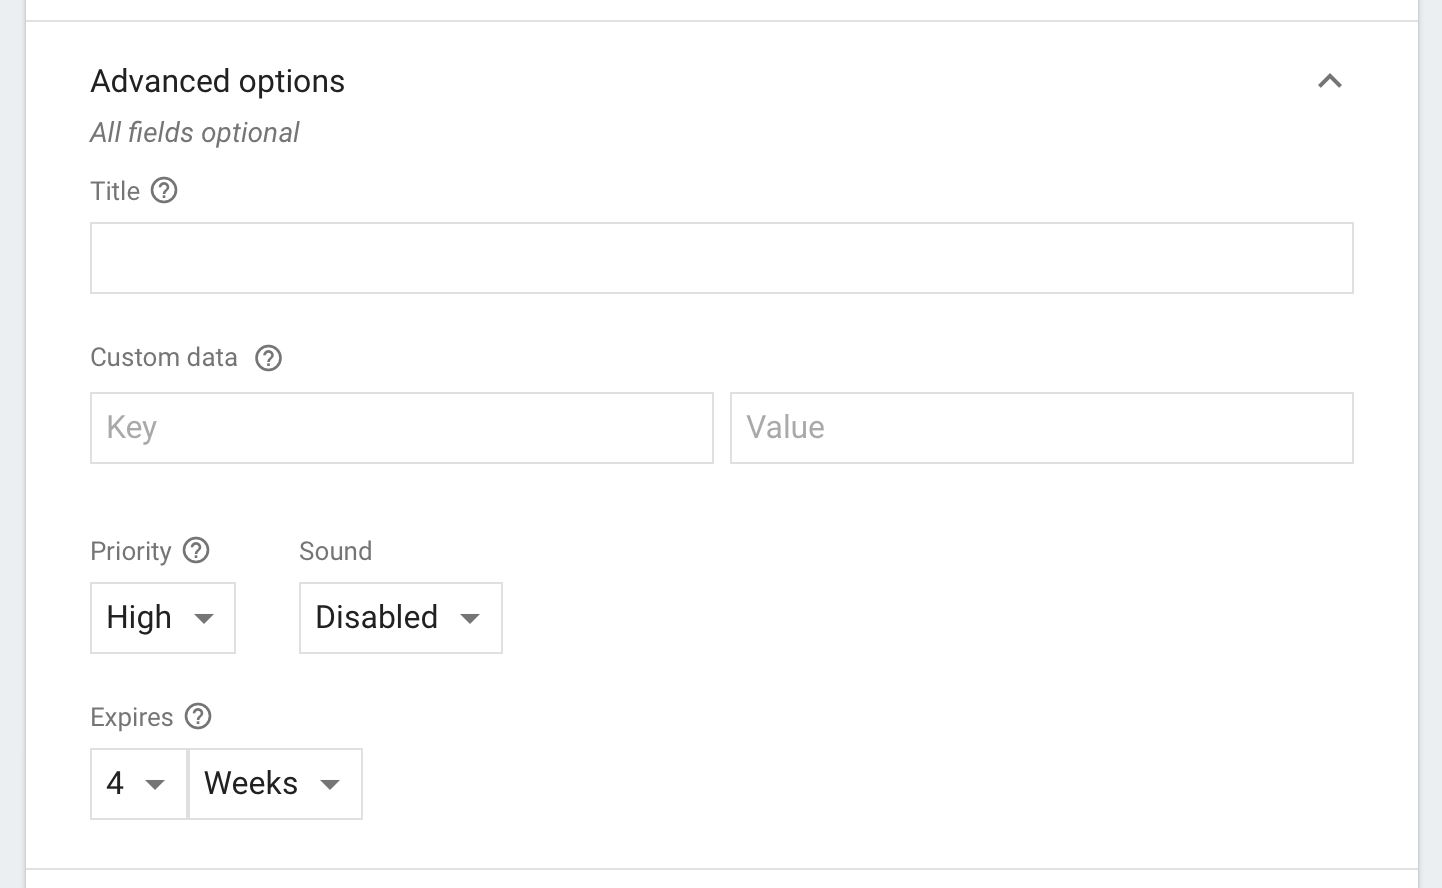
Even better, you can supply some advanced options. Namely, you can add key-value pairs that will arrive with your notification. In Android, these will be received as a Bundle.
For most people, this setup is perfect. However, in our app, I wanted to have a bit more control over the key-value pairs we send in our notifications. Our app uses these notifications as a sort of news feed, and in our key-value pairs, we send additional data to show up in the news update (the message is often too long to be communicated in the title and body of the notification alone, so we need these extra fields).
Rather than tell all content managers what keys and values to enter in these boxes, and then just hope that we never change the data structure and that the content managers never make typos, I implemented another Google Docs interface. Another future-proof feature that this method adds to the Firebase Notifications system is that we can do other things with the key-value pairs if we choose to. For example, I could choose to send the news update in a notification, but also to add it to the Firebase Database so that we could access it elsewhere in the app or show it to users even if they missed the notification when we sent it.
The approach is similar to that of the last post, but to make matters even simpler for the content manager, I use a Google Form to feed into a spreadsheet. This way, I can add informative text and images to show the content manager what field will map to what part of the app’s notification view.
We will again use a Google Apps Script associated with a spreadsheet. The script contains a function that grabs the data from the last row of the target spreadsheet (the one containing the notification’s key-value pairs), formats it into the proper JSON format, and then posts it to Firebase / Google Cloud Messenger.
In this example, let’s say we just want to send a notification using four pieces of information: the actual notification title and message, and then the additional information of a title and message of the news item to display in the app.
To begin, let’s set up some of the information we’ll need throughout the function:
function sendMostRecentNotification() {
  var Spreadsheet = SpreadsheetApp.openById("Spreadsheet ID from the URL!");

  // In my case, the notifications are stored in
  //	the 6th sheet of my spreadsheet.
  var notificationSheet = Spreadsheet()[5];

  // Subtract 1 because this is indexed starting at 1,
  //	but arrays are indexed starting at 0.
  var mostRecentRowIndex = notificationSheet.getLastRow() - 1;
  var mostRecentRowData = notificationSheet.getDataRange().getValues();

  Logger.log(mostRecentRowIndex)
  Logger.log(mostRecentRowData)

  var notificationTitle = mostRecentRowData[mostRecentRowIndex][0];
  var notificationBody = mostRecentRowData[mostRecentRowIndex][1];
  var newsItemTitle = mostRecentRowData[mostRecentRowIndex][2];
  var newsItemMessage = mostRecentRowData[mostRecentRowIndex][3];

  // More to come…
In the above block, I set a variable to access the spreadsheet and the notification sheet within that spreadsheet. Then I got our four pieces of data from the last row in the spreadsheet. I’m choosing to assemble the notification based on the last row because this sheet is being updated by a Google Form, which will load the most recent response into the bottommost row of the sheet. Using Google Apps Script triggers, I can set this function to run each time the form is submitted. Still, there is room for concern that this may create a risk of accidentally sending a notification more than once. To ensure this doesn’t happen, you can add an additional column to your spreadsheet and store whether or not the notification has been sent yet in that column. (I have a column that does this, called isSubmitted. It is empty if not submitted, and then it gets filled with the value TRUE once processed).
Now, let’s assemble the key-value payload (the Bundle that the app will receive).
  var payload = {
    "notification" : {
      "title" : notificationTitle,
      "body" : notificationBody
    },
    "data" : {
      "newsItemTitle" : newsItemTitle,
      "newsItemMessage" : newsItemMessage
    },
    "to" : "/topics/news" // (read below for info on this field!)
  }
The object contains a child object keyed by "notification". In this child, there is a "title" field and a "body" field. These fields in this particular object tell Firebase what the title and message of your notification will be (they will appear in the notification bar on the user’s device).
The next child, keyed by "data" is where our custom key-value items go. We’re sending the news item’s title and message here, which we grabbed from the spreadsheet in the earlier code block.
Finally, use the "to" field to set who should receive this notification. In most cases, you would want to put a Firebase topic here, as I did in the example above. You can subscribe users to a topic within your app by calling (in Android)
FirebaseMessaging.getInstance().subscribeToTopic("news");
Then, you would specify the topic as "to": "/topics/news" in your JSON object. If you want to test this out without sending a random notification to all your users, set the "to" field to your device’s registration token. You can easily access your token by including a line of code in your app. Read more on that here. Then, the notification will only be sent to your device. (Phew.)
The final step is to actually send this payload to Firebase. You’ll need to access your server key by going to your Project Settings from the Firebase Console and clicking on Cloud Messaging. This key goes into your POST request’s headers. Additionally, you’ll notice that in the following block, I access the aforementioned cell in my sheet for storing whether or not the notification has been sent.
  var headers = { "Authorization":"key=YOUR SERVER KEY FROM FIREBASE" };

  var options = {
    "method":"POST",
    "contentType" : "application/json",
    "headers": headers,
    "payload" : JSON.stringify(payload)
  };

  // Get the cell that contains TRUE if this notification has
  // 	already been submitted.
  var rowHasBeenSubmitted = mostRecentRowData[mostRecentRowIndex][4];

  if (!rowHasBeenSubmitted) {
    var gcmEndpoint = "https://fcm.googleapis.com/fcm/send";

    // Send it!
    var response = UrlFetchApp.fetch(gcmEndpoint, options);
    Logger.log(payload);
    Logger.log(response);

    // Write TRUE to the isSubmitted cell.
    notificationSheet.getRange(mostRecentRowIndex + 1, 5).setValue(true);
  } else {
    Logger.log("Notification was already submitted...")
  }
}
Note: in the options object, you must use JSON.stringify(…) on your payload object to send it as a String rather than a full JSON object, due to how the Firebase GCM endpoint receives your request.
So there you have it! Combining these blocks of code gives a function that assembles a notification with any custom data you want from a spreadsheet which can be updated by a Google Form. There’s a lot of room for customization in the code, and you can do more than one thing with the notification data in the notification’s row (such as storing it to your Firebase database as well, for later access in the app).
Now go make your app’s CMS easier for content managers!
✌
Questions? Email me.